Photography In Our Garden - Part 1 - Birds in Flight - Starlings
With the country at present in lockdown, I am forced to concentrate on photographing things in our garden. As it is still not really warm enough for many butterflies, moths and insects, I decided to concentrate on photographing some of the birds that we have. Although we live on the outskirt of a town , and only have a small garden, we do get quite a lot of birds visit our feeders, fat balls and free offerings which we put out for them. We have House Sparrow, Blackbird, Robin, Dunnock, Wren, Wood Pigeon, Collared Dove, Sparrowhawk, and lots of Starlings.
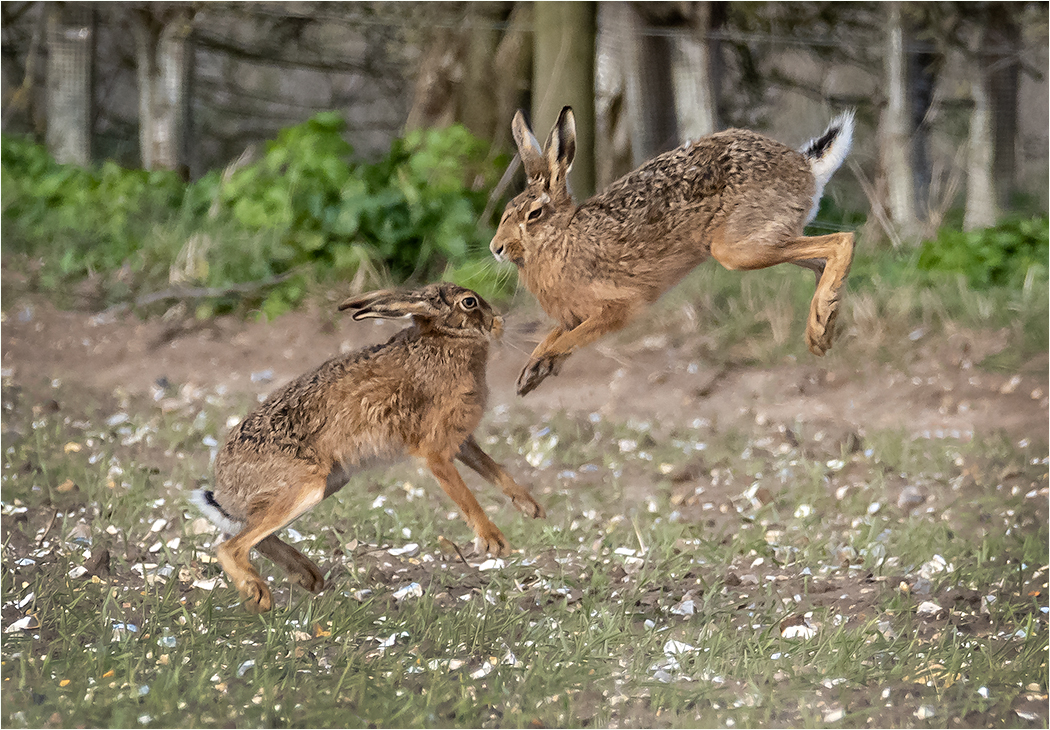
The Starlings in particular are very attractive birds, and although I have many fairly bog standard portrait shots of them, I did not have any of them in flight. Having changed to the Olympus system over a year ago, I thought his would be a good opportunity to utilise the Pro Capture mode on the EM1X camera.
The following few images are shots of Starlings in flight, and this is followed on by some images showing the set up, settings and how I obtained the images.
Olympus EM1X, 40-150mm F2.8 Pro lens.


The Set Up - How I Took the Shots
This is our garden. The shot is taken from our bedroom window. Its not a large garden and we live just on the outskirts of Colchester. We do feed the birds regularly, which is why we get quite a lot of birds visit us.

We normally feed the Starlings near the apple tree. We can hang peanut feeders and half coconuts filled with a mixture of soaked bread and lard in the branches. There is plenty of cover in bushes near by if the Sparrowhawk decides to visit, which it sometimes does.

I decided to use our garden shed as a hide to photograph the birds. The birds are used to it, and it was not a difficult job to get them to come close enough to the shed for me to photograph them.

I opened the shed door and hung some camouflage netting in the doorway so that they would not see me. It was quite easy to poke the lens through the netting.

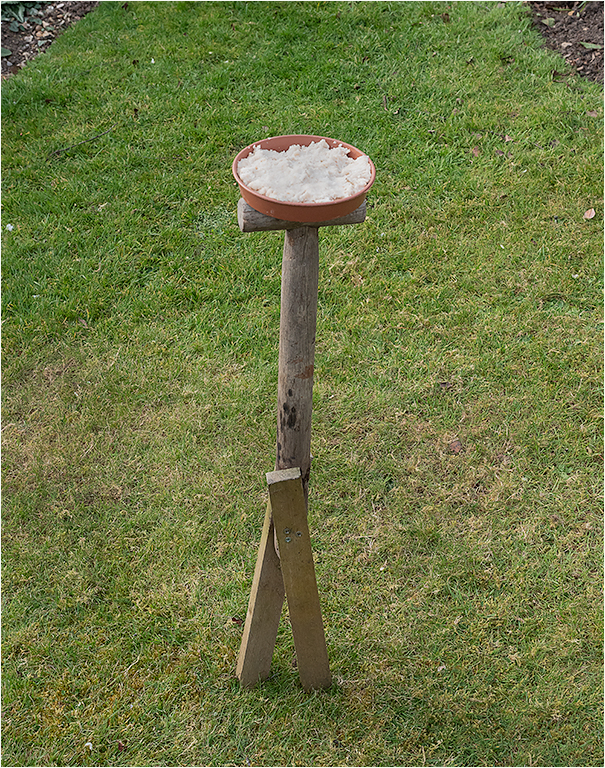
I wanted the birds to fly to a small plastic tray that I had filled with a mixture of soaked bread and lard. I needed something small ( rather than a bird table) because I wanted to restrict the area they could land on. That way I could roughly guess where they would be flying to. I positioned it about 15 feet in front of the shed. Because our garden faces east, I can only really photograph in the morning, because then the light comes up behind the shed.

This is the small plastic pot that the bird cake is in.
The Starlings would mainly fly from the apple tree (on the left hand side of the garden) to the pot with the bird cake in , so I could frame the image leaving a little bit more space on the left hand side of the viewfinder screen. This would give me space in the frame for them to fly into. This shot shows the direction they mainly fly.

I used Pro Capture High mode. With this mode, continuous autofocus does not work ( it does for Pro Capture Low ) I decided to manually focus approximately 2" behind the pot ( this is the area where I thought the birds would be flying into ) . To assist with getting the focus at the right distance, I placed a lighting stand 2" behind and to the left hand side of the pot. (This was really just as a focusing aid, the camera is on a tripod so once I have the stand in focus, I know the focus will not change ) I then removed the stand and waited for the Starlings to fly in to the pot.
In this picture you can see that the stem of the lighting stand is in focus, but the birds 2" in front of it are slightly out of focus. This is because I was shooting wide open at F2.8, and even with the extra depth of focus that you get with the Olympus, the depth of field was still very narrow. I used the 40-150 lens wide open at F2.8 because I wanted to get the fastest shutter speed I could obtain. The camera was set at ISO 800, and at F2.8 I was getting shutter speeds between 1/2000th sec and 1/1250th sec. The focal length on the lens was roughly 110mm, which equates to 220mm on a full frame DSLR.

Although they mainly flew in from the left hand side, they would sometimes come around to the right hand side, as in the following shot.

This was the final shot from this frame after cropping and cloning out the top of the heads of the two Starlings.

Because I had focused manually on where I predicted the birds would fly, I did get a lot of shots where the bird was not quite in focus. This is unavoidable, but if you persevere, you should end up with some that are perfectly in focus. The next one is one where it was not quite in focus. Its a bit soft on the head of the Starling

The big advantage of having a small pot with the food in was that if you had more that two or three birds on it, there was no more room for any more. When this happened, you would often get a bird hovering above the pot, which was a big advantage.

This is the full frame shot of a bird hovering

This is the full frame shot showing the area I cropped the final image from.

When shooting Pro Capture High (where continuous AF does not work) I find it easier to have the articulated screen out and to the side of the camera and to watch this for a bird flying in. When shooting Pro Capture Low (where the continuous AF does work ) I find it easier to look through the viewfinder. Not sure if this is what Olympus recommend, but its the way I have found that works best for me.


Obviously when shooting either of the Pro Capture Modes, you have the big advantage that when you half press the shutter button it is recording 14 frames but not actually writing them to the card until you fully press the shutter button. . When you do fully press the shutter button, it then writes those 14 frames to the card and you have hopefully caught the action. .